How to setup an open source Data Science environment with Python and R. Part 2/2
VirtualBox 6 on Windows host machine. Ubuntu Desktop 18.04.2 LTS under VirtualBox. Docker container with Jupyter image. Python and R Jupyter kernels.

Table of Contents
- VirtualBox (part 1)
- Ubuntu under VirtualBox (part 1)
- Ubuntu settings in VirtualBox (part 1)
- Ubuntu configuration
- Docker CE for Ubuntu
- Jupyter
Ubuntu configuration
Click Install Now button:

Click Restart Now:

Log in to Ubuntu. Open terminal. Update and upgrade Ubuntu packages:
$ sudo apt update
$ sudo apt upgrade
Select Devices VirtualBox menu. Click Insert Guest Additions CD image…:

Click Run button. Press Return in terminal.
Select again Devices VirtualBox menu. Select Optical Drives. Click Remove disk from virtual drive:

How to share directory between host machine and Ubuntu? Open terminal in Ubuntu and create new host directory:
$ mkdir hostAdd your user (e.g., medium) to vboxsf group:
$ sudo usermod -aG vboxsf <username>Example:
$ sudo usermod -aG vboxsf mediumShut down the system:
$ sudo shutdown -h nowOpen VirtialBox. Select Ubuntu Desktop 18.04.2 LTS virtual machine and click Settings button. Select Shared Folders tab. Click Add new shared folder icon:

Create shared directory on Windows host machine. Enter path to Folder Path field. Select Auto-mount option. Enter host directory path on Ubuntu (e.g., /home/medium/host). Click OK:

Click OK:

Select Ubuntu Desktop 18.04.2 LTS in VirtualBox and Click Start button:

How to mount shared directory permanently? Add line below to /etc/fstab file and save:
share /home/<username>/host vboxsf defaults 0 0Example:
share /home/medium/host vboxsf defaults 0 0Check result:
$ sudo mount -aDocker CE for Ubuntu
Install Docker CE for Ubuntu. If you would like to use Docker as a non-root user, add your user (e.g., medium) to the “docker” group with something like:
$ sudo usermod -aG docker <username>Example:
$ sudo usermod -aG docker mediumNote: Remember to log out and back in for this to take effect!
Jupyter
Download Jupyter Docker image (~6.23 GB):
$ docker pull jupyter/datascience-notebookRun Jupyter in Docker:
$ docker run -d -p 8888:8888 --name jupyter \
jupyter/datascience-notebook
Where:
- -d or --detach — run container in background;
- -p or --publish — publish a container’s port(s) to the host;
- --name — assign a name to the container.
Verify result:
$ docker ps
Get Jupyter token:
$ docker exec jupyter jupyter-notebook list
Save your token (e.g., 1fe440bef0c2973ab63d464a93ea8124ab5a93f598f5f9cb).
Open browser and navigate to http://localhost:8888/login. Copy token to Token field. Enter password and click Log in and set new password:

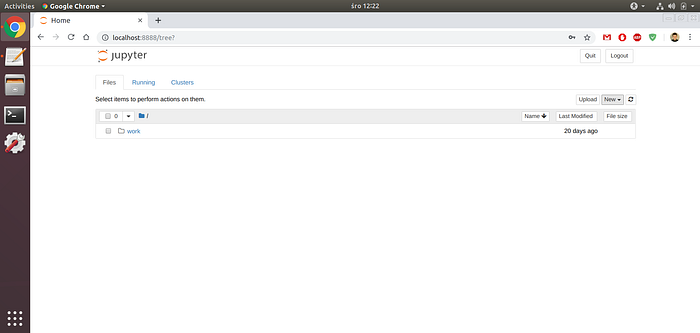
Final result looks like below:
Restart jupyter Docker container from terminal in Ubuntu:
$ docker restart jupyterAdd Jupyter to Ubuntu startup. Create rc.local file:
$ sudo touch /etc/rc.localAdd code below to rc.local file and save:
Make rc.local file executable:
$ sudo chmod +x /etc/rc.localJupyter runs on startup. Restart Ubuntu and verify result:
$ sudo rebootHo to execute sudo in Jupyter without password? Run 3 commands below in Ubuntu terminal:
$ docker exec -u root jupyter chmod 640 /etc/sudoers$ docker exec -u root jupyter sh -c \
"echo 'jovyan ALL=(ALL) NOPASSWD: ALL' >> /etc/sudoers"$ docker exec -u root jupyter chmod 440 /etc/sudoers
Verify result in Jupyter terminal:

